Route Highlighting |
Learn more about Verizon Connect GeoBase.
Get information about the latest release
Route Highlighting displays the most likely route that was taken, based on a series of RouteStops. This is useful when only the route stops are known, and the actual route taken is not known. In figure 1, a series of route stops has been imported into the Verizon Connect GeoBase Map Explorer application, and then the most likely route, based on the position and time between these route stops, has been displayed on the map. The main features of GeoBase's Route Highlighting are:
This tutorial will demonstrate how to use the Route Highlight features:
| 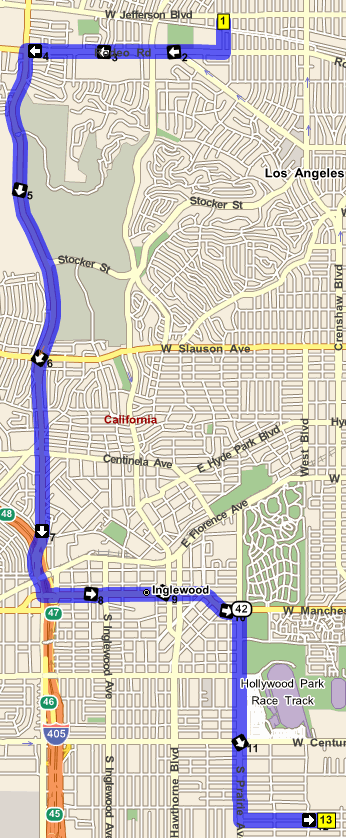 Figure 1 |
Route Highlights can be imported into Map Explorer by selecting Route | Load Route Highlight from the main drop-down menu and then selecting a suitable CSV file from the Open file dialog. When the file has been loaded into Map Explorer, the route highlight will be calculated and displayed on the map, as shown in the previous figure.
For convenience, the file that created the image above, RouteHighlightExample001.csv, is located in your MapExplorer\RouteHighlightSamples folder. Open the file RouteHighlightExample001.csv now.
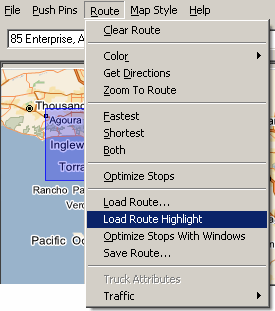
Figure 2
When you open this file, the map should look similar to that of figure 1. As can be seen from figure 1, the route stops along the route, as described in the CSV file, have been highlighted successfully with the most likely route taken. What is not so obvious at first glance however is that the position of a number of the route stops along the route do not appear to be valid. For example, zoom in on route stop 6 (see figure below).
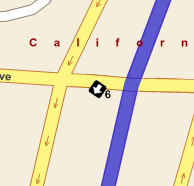
Figure 3
Although route stop 6 is obviously in the wrong position, the Route Highlighting function can still highlight the most likely route taken. As another example, zoom in on route stop 8. Again, the position of this point appears to be incorrect. Although the heading looks valid (East), the flow of the traffic here is West. Once again, the Route Highlight function can cope with this "contrary" point.
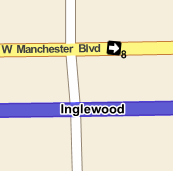
Figure 4
The position and heading of each route stop along a route can be altered manually. Altering the route stops in this fashion can assist in the analysis of the route.
To change the position of a route stop, hold the mouse over the route stop to be moved, and while simultaneously pressing the 'Ctrl' key on your keyboard, move the route stop to a new position on the map.
It should be noted, however, that route stops that are placed too far apart (that is, from a time point of view) will be treated differently with the route highlight. In the image below, route stop 13 has been manually moved to a position that would be impossible to route to based on the time since the previous stop. Therefore, the route highlighting can only draw a straight line between the two stops which emphasizes the fact that something is not quite right with the data.
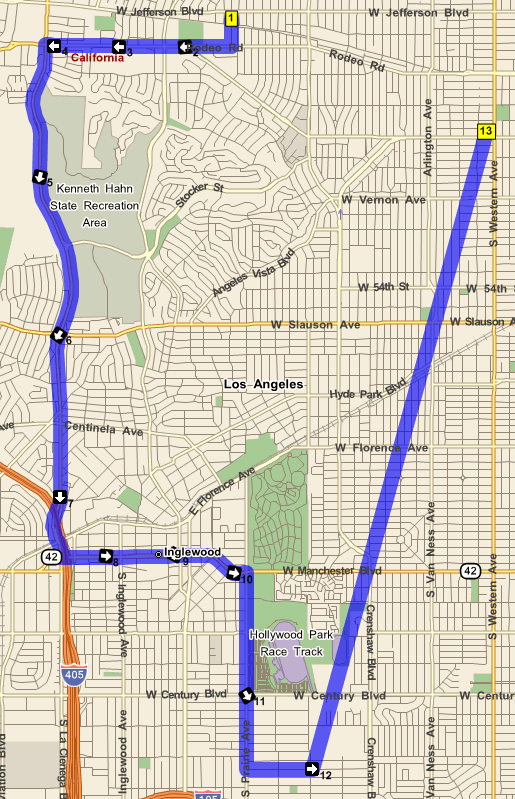
Figure 4
To add a heading to a route stop, right-click on the route stop, and select Set Stop Heading from the context menu.
To delete a heading from a route stop, right-click on the route stop and select Clear Stop Heading from the context menu.
To change the position of the heading on a route stop, hover the mouse over the stop, and a handle will become visible (see figure below). Move the mouse over the handle, and while simultaneously pressing your keyboard's 'Ctrl' key, rotate the stop's heading to a suitable position. Release the 'Ctrl' key to set the heading.
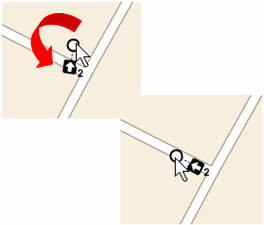
Figure 5
To regenerate the route highlight after, say, changing the heading or position of a stop, right-click anywhere on the map and select Route | Get Route Highlight. The route highlight will be re-calculated and then displayed on the map.
For a code example using the Route Highlight feature see the GetRouteHighlight method.